Showing posts with label sew. Show all posts

Saturday, January 25, 2014

Recent Projects

Here are a couple of recent projects! More how-tos to come! But for now, check these out.

Bridal Party Gift: Apron

I anticipated it being a little sexy apron that you can cook in AND play in. With the apron, I gave some choice items including but not limited to a duster and red lipstick. Here are a few shots of the process!

I love pleating!
Now I am thinking it should have ONLY been the white part... next time!
Making progress...

The finished apron took a lot of fighting and reevaluating. I did end up pleating the chest part to make fit and it looked sexier then before so I am okay with it! Next time, it will be a smoother process!


Baby Shower Gift: Bibs!

My friends are having a baby boy so I threw together a couple of baby bibs for her baby shower! I may do a tutorial down the road. 


Baby Gift: Diaper Clutch!

My friend just had her first baby girl! I made this clutch and a coordinating changing pad. With the gift, I included wipes and diapers so she can grab this and go when on the run. [Please just imagine the diamond button I finished the clutch with.] 


Thank you,
Abby

DIY Cord Strap

I impulsively bought a beautiful laptop case - problem is: it's wide open with no pockets or sections. My computer cord ends up unwrapped from itself and engulfing everything else in the bag. SO it need some TLC. This is an easy project for headphones, phone charger or any long cord.

I decided to make a strap to keep it in place. It took me no more then 30 MINUTES - I promise, it's that easy!

What you need:


  • Two scraps of coordinating fabric
  • Velcro (button or snaps work too)
  • Thread
  • Sewing machine (DUH)
For Christmas, I made a computer case out of these fabrics and I LOVED them together


How-To:

  • Cut the fabrics 2.5"X12.5" for an Apple computer cord (adjust as needed)
  • Pin right sides together
I curved one end to give it some character
  • Sew the edges leaving an inch gap to pull fabric through
  • Flip inside out
  • Iron well
  • Iron and pin the hole in place
  • With coordinating thread, sew along the outside edge making sure to secure the gap you pulled the fabric through.
  • I used iron-on velcro but a button or snaps would work well too. Pay attention when ironing these on - with the curved edge, put the velcro on the back side. Measure it around your cord and place the second velcro on the front side toward the bottom.  

  •  Tada!! Your computer cord, head phones or phone charger will be kept clean and organized while being bounced around throughout the day!  


lots of love & coffee,
Abby

Wednesday, June 26, 2013

Easy DIY Pillowcase Dress

Good afternoon!

I received an email from my Aunt a while ago about an organization who's mission is to create a world where every little girl owns at least one dress! Women from all over the globe partner with this organization called Dress a Girl Around The World (http://www.dressagirlaroundtheworld.com) to send dresses to every part of the world. I have decided to join the cause!


Here is the easy step-by-step process of making cute pillowcase dresses for little girls! 


Start with a pillowcase - of course, mine is zebra print. :]


Fold the pillowcase in half the long way to cut the arm holes


Cut the arm holes out - for the pattern, go here!


 Unfold the pillowcase and cut the top seem off.


Time to pull out the iron! 
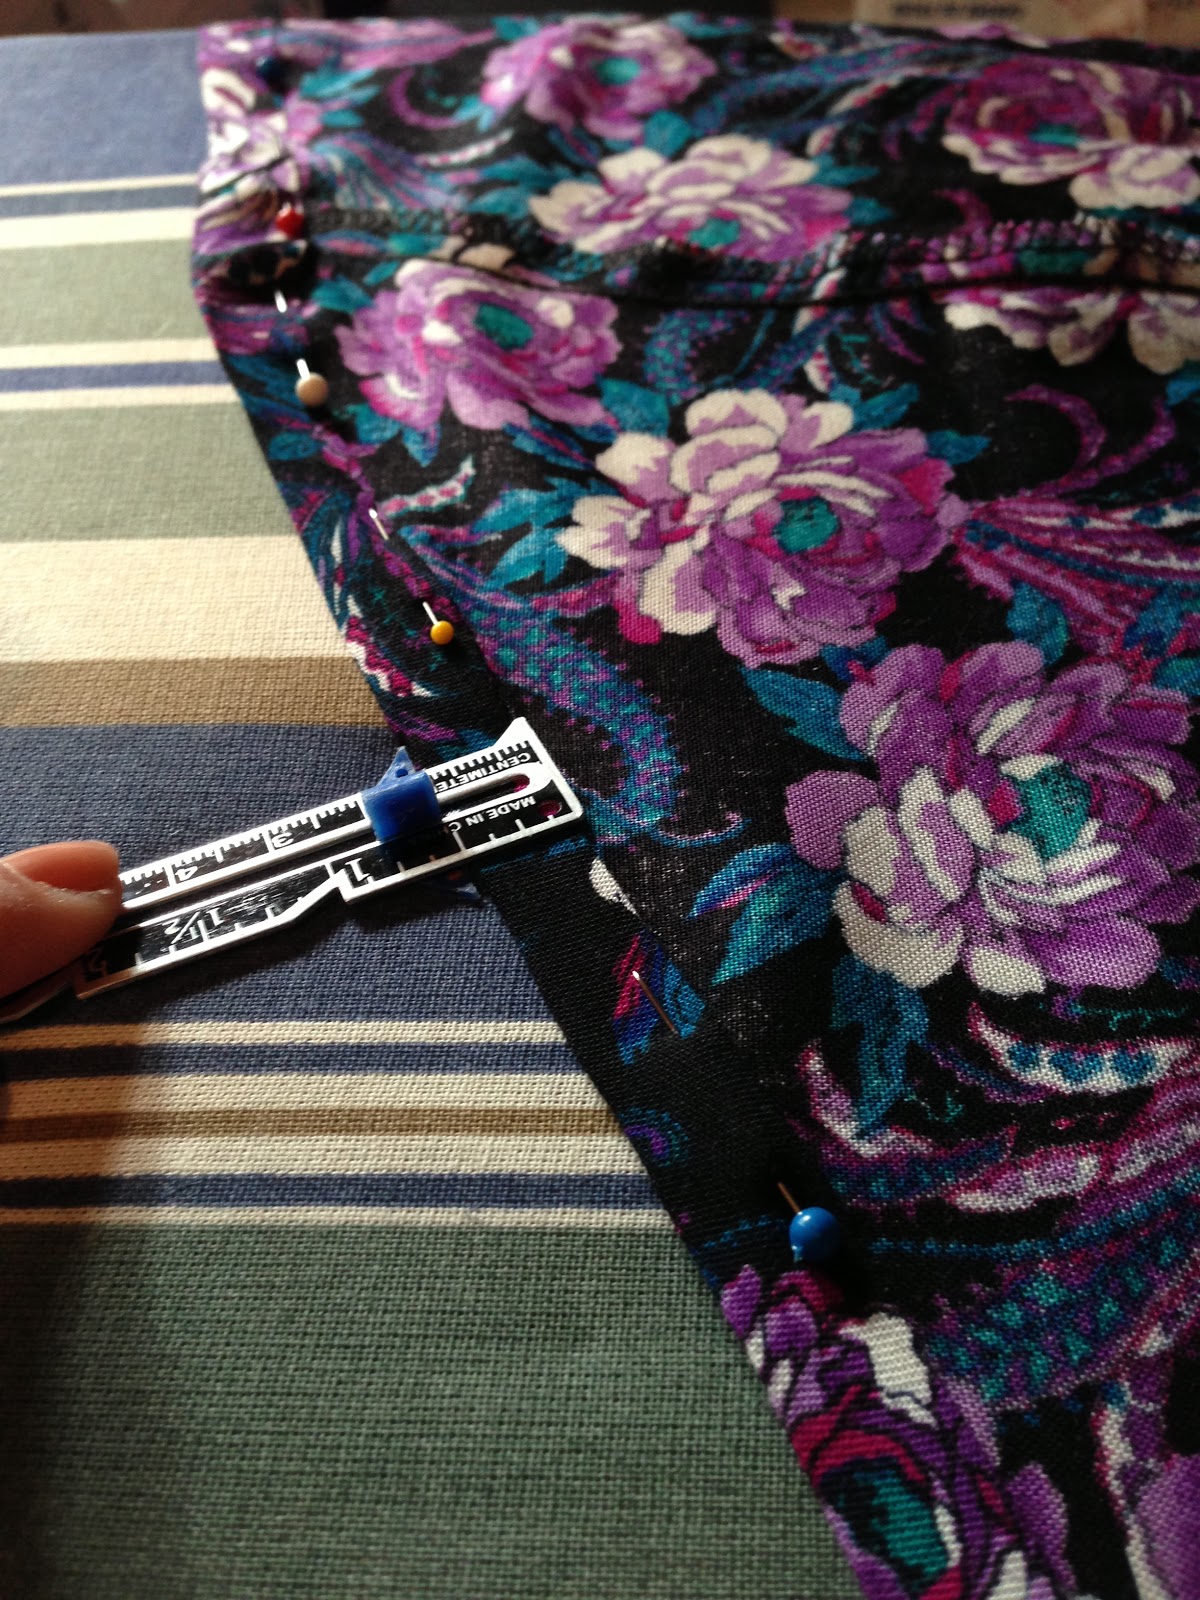
Fold both edges at 1/4inch to get a clean hem pressing with the iron.


Fold one more time at the 1inch mark, iron and pin.


 Pin and run through the machine as close to the edge as possible!
** If you want a ruffle at the top of the dress, as you'll see below, sew a second line measuring 3/4' from the previous sewn line to create a tube for the elastic to be stringed through. You'll want to make the fold a bit deeper as well. I have been doing 1.5' instead of 1' (see previous step).


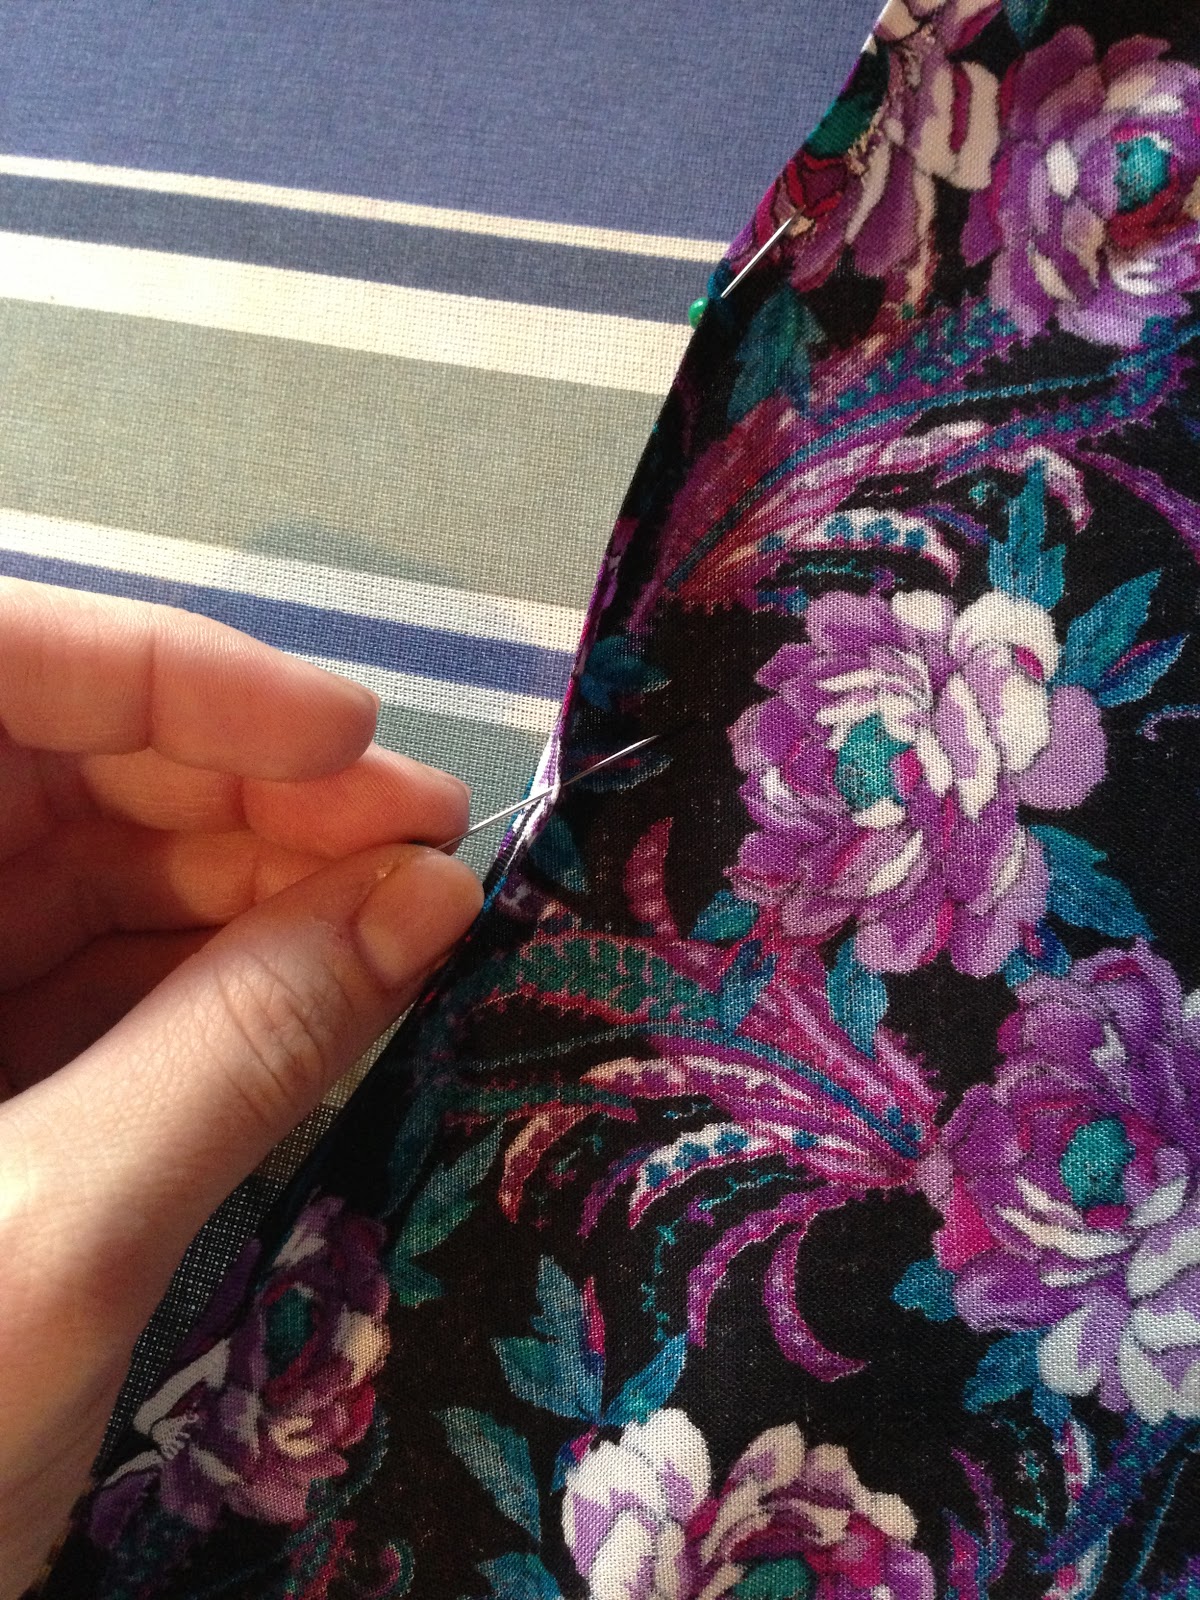
Cut a piece of elastic and put a safety pin on one side to thread through the neckline. Sew the first end going back and forth on the machine then pull the elastic through with the safely pin to the other side and sew again - you will be creating a ruffle so don't be afraid if you feel like your elastic isn't long enough.


Can you see where the elastic is securely sewn?

Next comes the hard part - binding! Choose your color and make sure there is a double fold - to give you a clean look. You'll want lots of extra on both sides to tie a bow at the top. Find the halfway mark and pin the binding at the center of the arm hole. Carefully pin up the sides of the armhole.


Thread your machine to match the color of you binding and began to sew! I usually do a small zigzag because it is CUTE and can catch any fabric that has shifted.

Add decoration and taduh!!

Special thanks to my lovely models! You can see I took the zebra dress up a few inches from the first picture and used it on the bottom of the blue dress. Then I added the pink piece to the zebra!

Notice the ruffle? My favorite part!

I ended up shorting this dress to just above her little knees! 


I am selling my dresses for $12.00 and with every purchase I'll be shipping a dress to my favorite orphanage in Guatemala called Casa Angelina. 


I hope this will help you create your own wonderful masterpieces in the future!
Let me know if you have any questions or would like to purchase a dress and in turn purchase a dress for a little girl in Guatemala.

God Bless,
Abby


Tuesday, January 1, 2013

Bow Tie Back Dress

Happy New Year!!
I am soo excited about this upcoming year!
This dress was a Christmas gift from my wonderful sister

Merry Christmas meeeeeeee!!


I started by turning the dress inside out, cutting out the shoulder pads, straps and about 2 inches off each side & the sleeves.

Next, I followed the seems in the back and cut a rectangle out.

& cut a wide neck.

Chop chop!!

I took the bottom of the skirt and cut it into 3 pieces.. (I did end up only using two of the pieces)

Measured, cut and pinned them inside out.

Than sewed along the long side leaving both short ends open 

Now, there are 3 loops

Next came the binding and the meticulous pinning!

I measured 1/2" from the bottom and pinned one of the loops
Twisted it and pinned the other side 1/2" from the bottom.
The second piece was pinned 1" from the top of the first one
Twisted and pinned on the other side 1" from the top of the lower one.


taadaa!


before & after

Blessings!
<3


Thursday, November 8, 2012

Easy DIY: Low-to-High Skirt

Good afternoon friends!


I've had this guy in my closet for a couple months know while contemplating what to do with him - so many options! One suggestion was to make shorts (I'm not sure I'm ready for that yet), another option would be a one-sholder dress (I think I'll save that for next time) so I decided to make a low-to-high skirt :)

Before!
Did I mention it only cost $0.99!
Start by turning the skirt inside out and fold it in half - I have the front to the right and back to the left. I put the skirt on and placed a pin where I wanted the skirt to fall above my knee.
Next I used white chalk to draw a line from my pin to the bottom of the skirt. Be careful to make sure the front and back are straight with the angle in-between otherwise you'll get a funny 'peak' in the front or back. **This is the MOST IMPORTANT PART**


I pinned the skirt along the chalk line to guarantee there was no movement and crooked lines


Chop chop!

Next for the hem...

I had the skirt inside out, folded the material in 1/6" (roughly) and pinned the outside - it was awkward at first but it made the next step easier.

After I pinned the skirt in 1/6" (roughly) all the way around I started the second fold. This I did at 1/2" using this handy-dandy tool thingy [below], ironed and pinned it down. This will give it a nice finish!


The hem
Sewing time!


Gave it a quick iron and thats it!
After!
Love it!!


before & after


Thank you for stopping by!
Give it a try and let me know how it goes!!